GiD - The personal pre and post processor
Animations
This tutorial explains several details which should be taken into account when an animation is created for a later presentation.
Then an example is used showing tips regarding the creation of presentation videos.
Basic rules
The two most important rules when creating an animation are:
- which is the target of your animation, i.e. where should your video be reproduced, and
- save the data used to create the video, including view, size and results, because surely the video should be recreated with small modifications.
The basic rules that should be followed when creating an animation are:
- Target of the animation: if the animation is to be included in a presentation to be projected, usually projectors have a resolution of 1024x768 or 1280x720, and your desktop monitor is 1680x1050 or 1920x1080.
Size of the window: avoid creating videos in full-screen mode. In full-screen mode, the videos will be very big and, when the presentation reduces the resolution to fit the projector, details will be lost and text will become unreadable. Use the Resize graphical window macro (
 ) or the Resize option in the Window --> Animate window or the render size control macros, which define the size of the graphical view of the model. These options are also useful to resize the graphical window between sessions. You can use this macro to guarantee the size of the graphical window when changing from pre to post or between gid sessions.
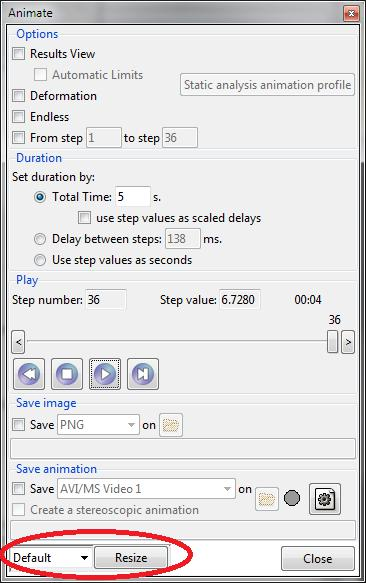
Resize button in the animation control window
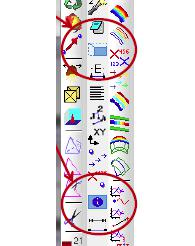
Macros to control the rendering window size
- Views: centre your region of interest and save the view using View --> Save. This way the view can be used to do different animations, or glue together different animation chunks.
- Format: there are several compression formats, but the recommended ones are:
- AVI/MS Video 1 : Recommended for presentations, although is very old, it's the most compatible and videos created with this compression can be embedded in presentations without problems and all video players can reproduce them.
- MPEG : uses the MPEG2 codec, it's also supported every where, although in MS Windows some problems can appear if the resolution used is bigger than 720x576.
- Macromedia Flash Video ( flv) : Recommended for webs, uses the "screenvideo" compression, but needs a player ( like any other video) if the animation is included in a web page.
- GIF : to include the video as picture in a web page. Bear in mind that the color quality may be adversely affected by the drastically reduced palette, only 256 colors can be used. Try the different gif options to select the best for your animation.
- Graphical objects: graphical objects, like legends, comments or axes can be placed anywhere in the screen using the Utilities --> Tools --> Move screen objects .
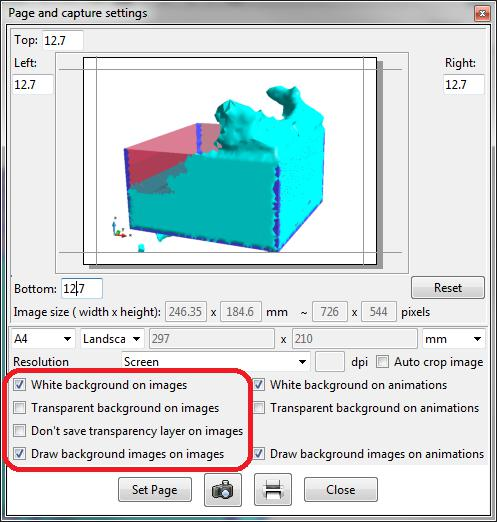
Background: despite the configuration of the viewed background, when creating a video the background settings are controlled through the File --> Page and capture settings:
|
|
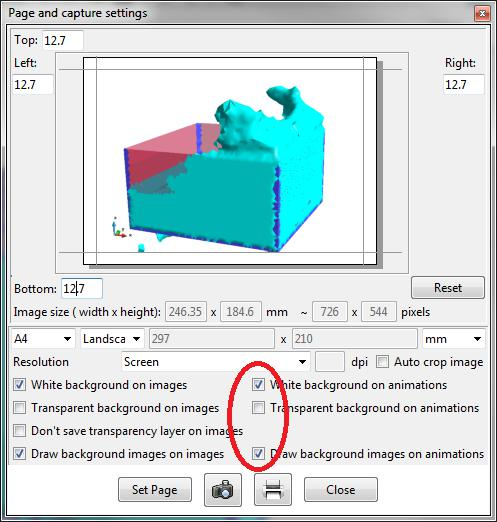
Note: the Resolution options in the above window is very useful to create images of increased size needed for publications like posters, articles or books. This options is not used to create high-resolution videos.
- Perspective: use perspective for a better perception, can be enabled through View --> Perspective...
Stereoscopy (3D)
Stereoscopy can be enable through the window View --> Advanced view settings
- Perspective: use perspective for a better perception, can be enabled from the same window or through View --> Perspective...
- Full-screen: a better 3d experience can be achieved in full-screen mode, by pressing F11 or View --> Full screen.
- Colors: if the stereo mode used is the Anaglyph colors, the color palette is drastically reduced, because some colors are only viewed by one eye and not by the other producing discomfort. The appropriated colors depends on the color filters used. If 3d color filters used are red and cyan, most of the cases, then there is a special contour fill color map for this mode, under Option --> Contour --> color scale --> 3D anaglyphs, if the 3d color filters used are red and cyan.
Useful colors for red & cyan stereoscopy are greys, white, magenta and yellow.
- Saving videos: at the bottom of the Animate window there is an option called Create a stereoscopic animation which can be used to save stereoscopic animations, which can be reproduced with the proper player. In these videos, the image for the left eye and the one for the right eye are saved in the same frame, i.e. doubling the horizontal resolution of the frame, and the player splits these left and right images and alternates them in the output. Stereoscopic animations can also be created in non-stereo computers.
Example
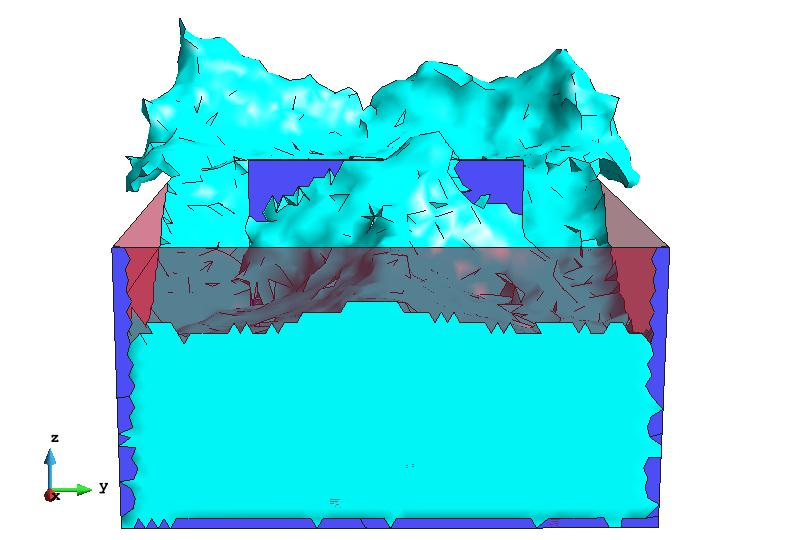
Model used in this example:
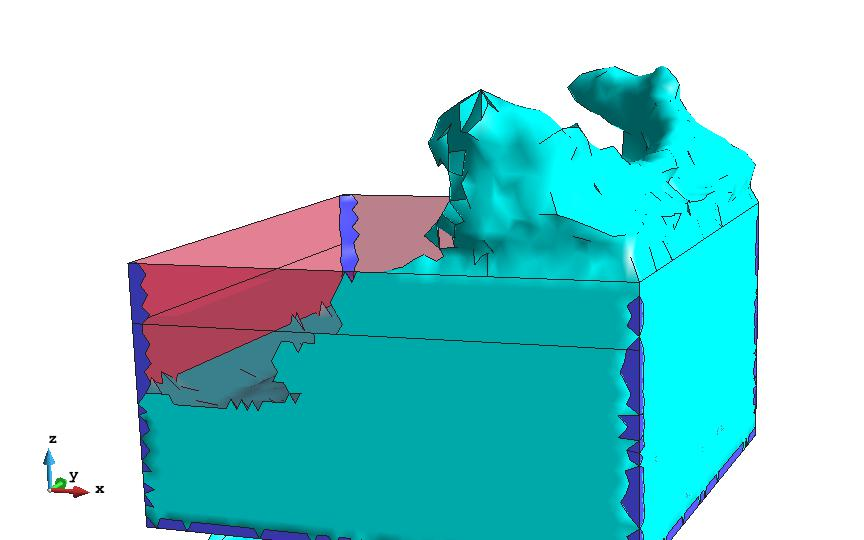
This example is a simulation of a very simple wave generator, which has different meshes at different time-steps. The file wave_generator.post.bin can be found at Material location.
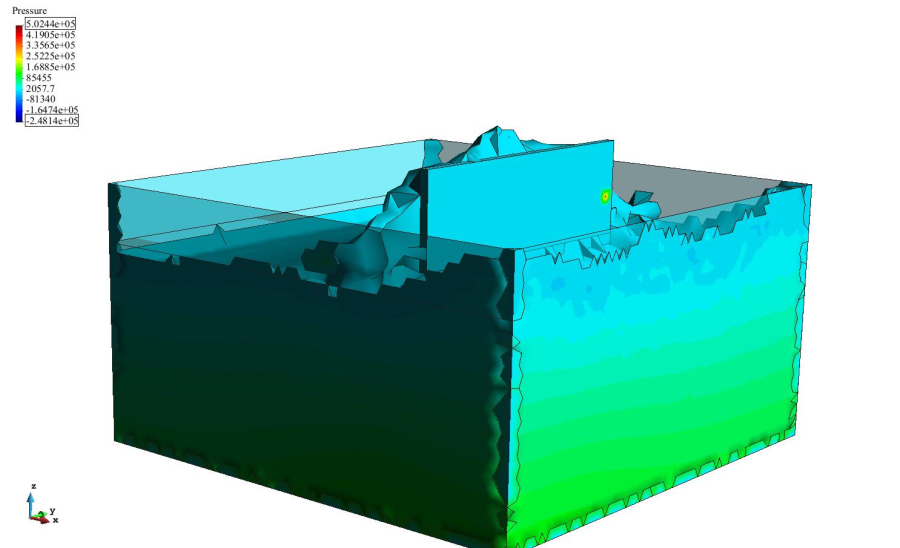
First observation: resolution
- Load the wave_generator.post.bin, file which can be found at Material location;
- do a contour fill of Pressure and maximize the window;
- with Utilities --> Tools --> Move screen objects move the legend to the upper left corner;
- now create an animation:
- with a Delay between steps of 1000 ms,
- with Automatic limits enabled,
- using the AVI/MS Video 1 compression codec,
- and save the animation;
- now reduce the size of the graphical window to 640x480 and save the animation with another name;
- reproduce both animations reducing the player window to half of the screen;
- it can be observed that the legend information can not be read in the first animation, but in the second;
411px
|
|
Second observation: perspective
- With the same example, just select Results --> No results
- rotate the model so that the wave comes to you;
- play the animation;
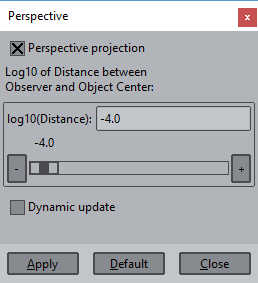
- enable perspective (View --> Perspective);
- Set log10 distance: -0.4; Apply changes;
- play the animation again;
is there a difference?
|
|
Perspective option enabled
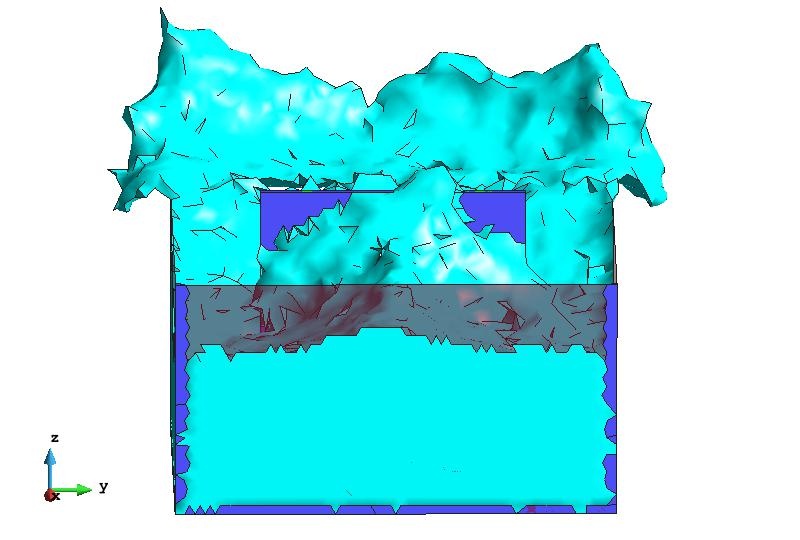
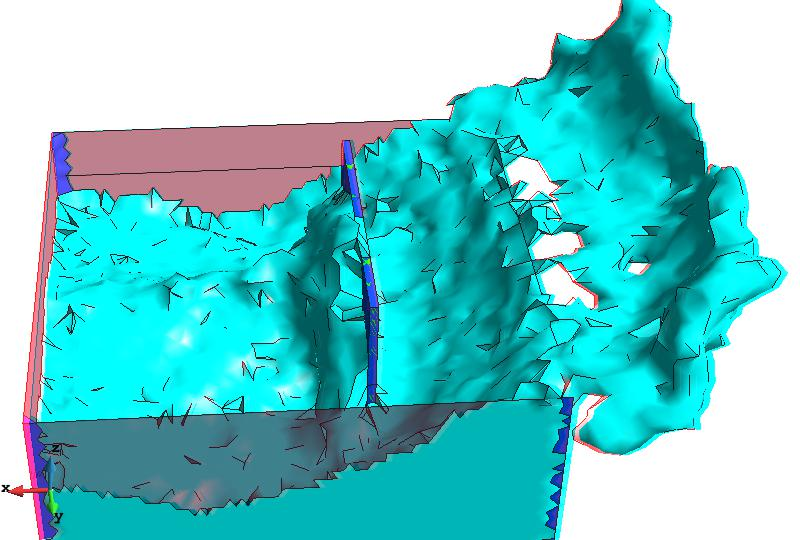
Third observation: 3D
- With the same model, open the View --> Advanced viewing settings ... window;
- now enable the stereoscopic view:
- some settings may need an adjustment, like the eye distance, which depends on each viewer;
- there is a bad 3D perception due to the bad colors:
- the liquid mesh is sky blue, and therefore only the right eye sees it and the left eye only sees a black region ( try closing one eye and then the other);
- try doing a contour fill, for instance of the |Velocity| result, some colored regions are better perceived than other ( try again closing one eye and then the other);
- play with the animate window
|
|
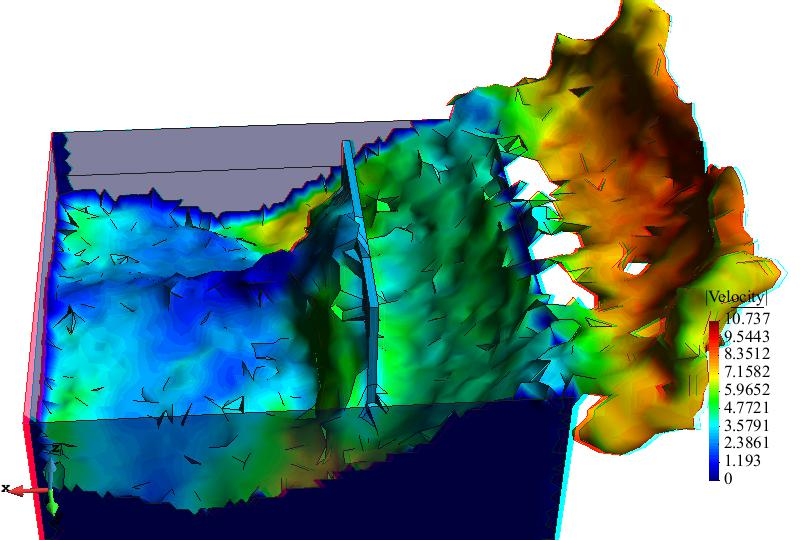
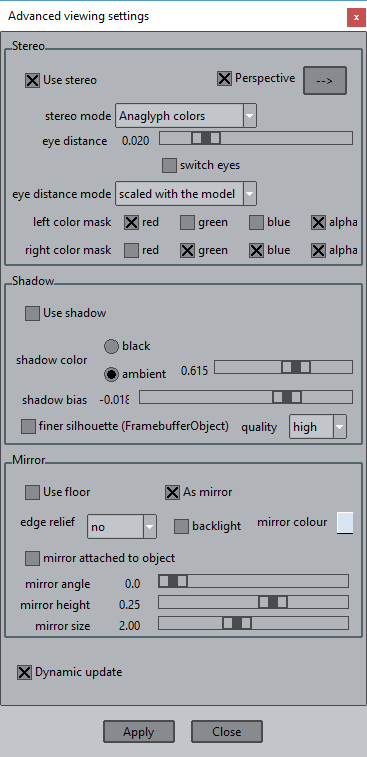
- correct the colors:
- try choosing different color for the meshes, like grey, yellow, or magenta;
- in the contour fill just select Utilities --> Preferences --> Postprocess >Contour fill and lines --> Color map --> 3D anaglyphs or 3D anaglyphs 2, this is a special color map which uses colors visible by both eyes at the same time when the user is using the red-cyan glasses;
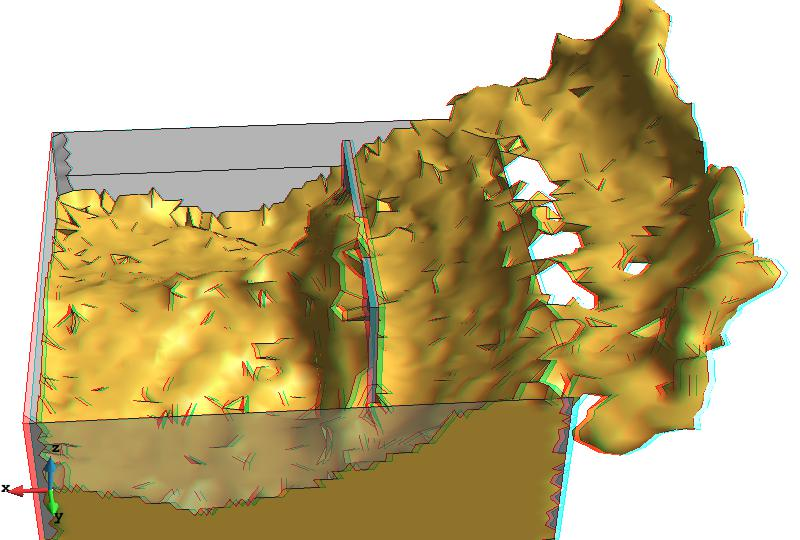
Meshes drawn using grey and gold like colors which can be seen from both eyes
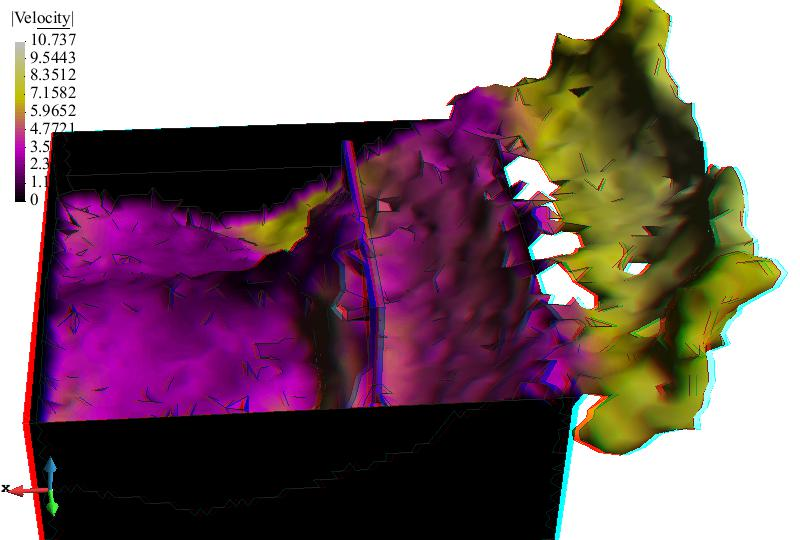
Contour fill of |Velocity| using the 3D anaglyphs color scale
- play the animation again;
- press F11 to enter Fullscreen mode
COPYRIGHT © 2022 · GID · CIMNE